 Merken
 The first time I made these bites, I wasn't planning to—I had leftover Brie and a sheet of puff pastry defrosting on the counter, plus a bottle of chili crisp someone had brought to dinner. I started folding and layering almost by accident, drizzling honey between the layers, and when they came out of the oven all puffed and golden with the cheese melting through the cracks, I understood why people reach for them first at any gathering.
I made a batch for a potluck once and watched them disappear before anything else was touched. A friend asked if I'd catered them—and that's when I realized the real magic isn't the ingredients, it's how they feel in your mouth: that moment when warm honey and crispy pastry meet creamy Brie and that little shock of heat.
Ingredients
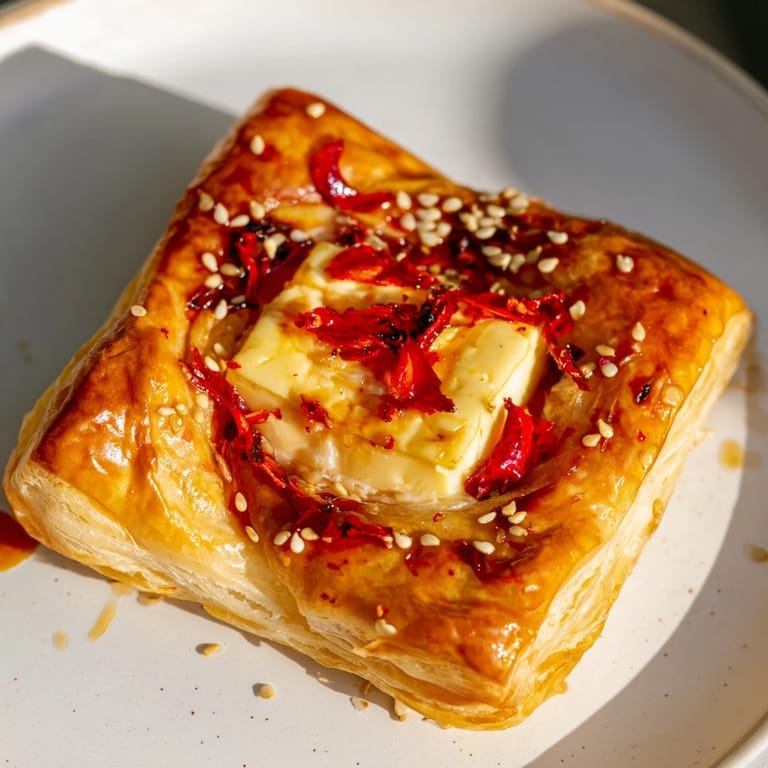
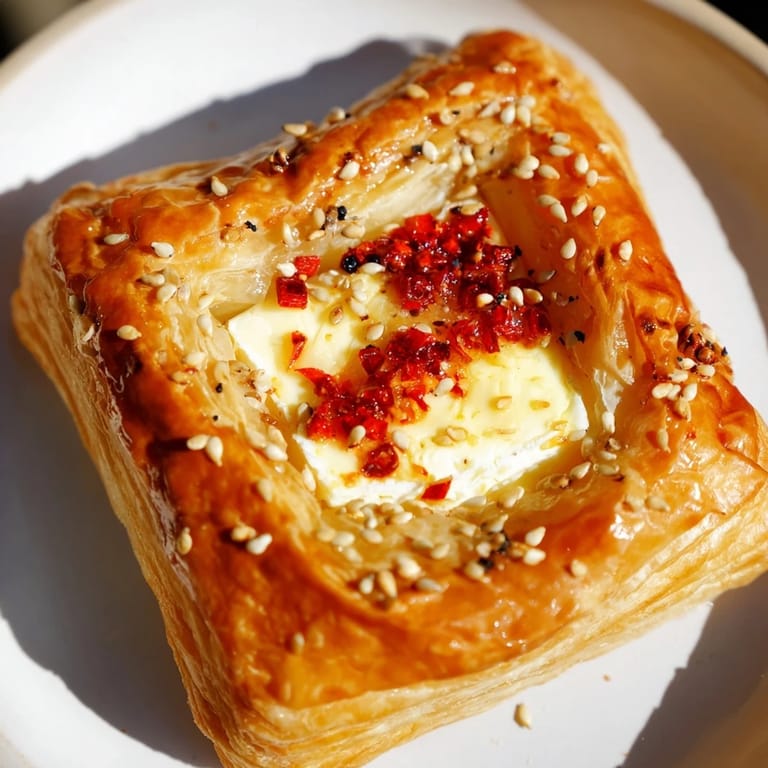
- Brie cheese (200 g, rind on): The rind keeps the cubes from melting completely into the pastry; they hold their shape and create pockets of warm, oozy creaminess.
- Puff pastry (1 sheet, thawed): Room temperature pastry puffs better and browns evenly; don't skip thawing it properly or you'll end up with dense, uncooked centers.
- Honey (2 tbsp): Adds sweetness that balances the heat, and a tiny amount per bite keeps them from becoming cloyingly sweet.
- Chili crisp (2–3 tbsp): Store-bought is fine, but good quality makes the difference between pleasant warmth and memorable complexity.
- Egg (1, beaten): The egg wash creates that glossy, restaurant-quality golden finish and helps the pastry puff dramatically.
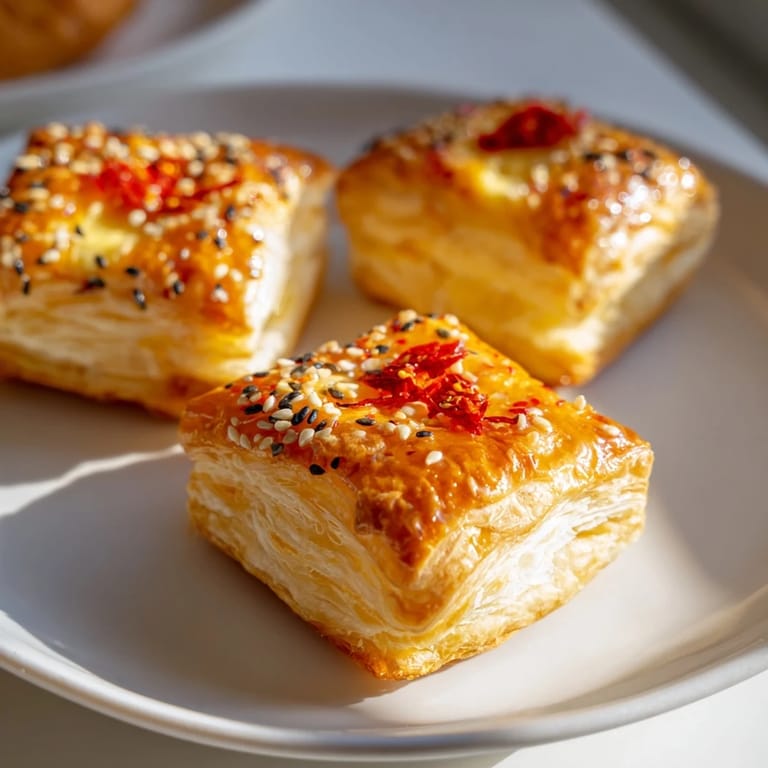
- Sesame seeds (1 tsp, optional): They add a subtle nuttiness and visual texture; skip them if you prefer simplicity.
Tired of Takeout? 🥡
Get 10 meals you can make faster than delivery arrives. Seriously.
One email. No spam. Unsubscribe anytime.
Instructions
- Heat the oven and prep your workspace:
- Set the oven to 400°F and line your baking sheet with parchment—this prevents sticking and ensures even browning underneath. Cold ingredients work better with hot, dry heat.
- Cut the pastry into neat squares:
- A lightly floured surface keeps the pastry from sticking without absorbing excess moisture. Aim for roughly 2×2 inch squares; slightly uneven is fine and actually more charming.
- Fill each square with Brie, honey, and chili crisp:
- Start with the Brie cube in the very center, then add just a small drizzle of honey and a tiny pinch of chili crisp. Restraint here prevents the filling from leaking out during baking.
- Fold and seal the corners:
- Bring the four corners up and over the filling, pinching them together gently where they meet. If you leave them slightly open (rustic style), the cheese peeks out beautifully as it bakes.
- Brush with egg wash and garnish:
- Use a pastry brush to coat each bite lightly with beaten egg, then scatter sesame seeds if using. This step is what makes them look and taste professionally made.
- Bake until golden and puffed:
- Watch them around the 14-minute mark; they should be deep golden and visibly puffed. Every oven is different, so check at 16 minutes rather than waiting the full 18.
- Cool and serve:
- Let them sit for 5 minutes—this lets the pastry set slightly so it's crispy rather than floppy. A final drizzle of warm honey right before serving is optional but worth it.
 Merken
 There's a moment near the end of baking when the smell hits you—toasted pastry, warm honey, and that unmistakable savory richness of melting cheese. That's the moment you know they're going to be good.
Timing and Make-Ahead Magic
I often assemble these completely an hour or two before baking, covering them loosely with plastic wrap in the fridge. Cold pastry actually puffs better, so there's no downside to prepping ahead. If you're bringing them to a gathering, bake at home and transport them in a covered container—they're still delicious at room temperature, though a quick warm-up in a 300°F oven for 5 minutes brings back the crispness.
Flavor Variations That Work
Goat cheese or Camembert swap in beautifully if you want something slightly tangier or earthier. Some people add a tiny pinch of fresh thyme or rosemary on top before baking, which smells incredible. You can also play with the chili crisp—try one with garlic, or use a drizzle of hot honey instead for a different heat profile.
Serving and Storage
These are best warm, but honestly they work at room temperature too. I've left them out for hours and they're still good—the pastry stays crispy because of the parchment paper underneath, not sitting directly on the sheet.
- Refrigerate leftovers in an airtight container for up to 3 days, then reheat gently.
- You can also freeze unbaked bites on a tray, then bake directly from frozen (add 2–3 minutes to baking time).
- Pair them with sparkling wine, prosecco, or even a crisp white for an instant party moment.
 Merken
 These bites prove that the most impressive appetizers don't require complicated techniques or rare ingredients—just a few good things assembled with intention. They'll become a go-to whenever you need something that tastes like you spent hours in the kitchen.
Fragen & Antworten zum Rezept
- → Wie verhindert man, dass der Blätterteig beim Backen weich wird?
Der Blätterteig sollte vor dem Füllen gut gekühlt sein und die Füllung nicht zu feucht. Beim Backen sorgt das vorherige Bestreichen mit Ei für eine schöne Kruste.
- → Kann man den Brie durch einen anderen Käse ersetzen?
Ja, Camembert oder Ziegenkäse bieten ebenfalls cremige Alternativen mit unterschiedlichem Geschmack.
- → Wie lässt sich die Schärfe des Chili Crips anpassen?
Die Menge des Chili Crips kann je nach Vorliebe reduziert oder durch milde Chili-Soße ersetzt werden.
- → Was ist der beste Zeitpunkt zum Servieren der Häppchen?
Am besten warm servieren, unmittelbar nach dem Backen. Bei Bedarf lassen sie sich kurz im Ofen aufwärmen.
- → Kann man die Häppchen vorbereiten und später backen?
Ja, man kann die gefüllten Blätterteigstücke vorbereiten, abgedeckt im Kühlschrank lagern und kurz vor dem Servieren backen.